
Drying Herbs: How to Dry Basil, Mint and Other Fresh Herbs
Cut most herbs just before they flower and hang small bundles of sturdy herbs indoors until the leaves crumble. Moist herbs such as basil and mint mold unless they dry fast, so use a dehydrator for them if you have one, set between 95 and 115 F. Eight extension sources compared on dehydrator, oven and microwave settings, plus storage.
Sources: National Center for Home Food Preservation, Penn State Extension, Oregon State University Extension Service, University of Wisconsin-Madison and 4 more. See the sources we used. How we source our guides
On this page
Cut most herbs just before they flower and hang small bundles of sturdy herbs like rosemary and sage indoors in an airy spot until the leaves crumble. Moist herbs mold unless they dry fast, so use a dehydrator for them if you have one, set between 95 and 115 F.
The method depends on the leaf: sturdy herbs dry well hanging in the air, while tender, moist ones such as basil, mint, tarragon and lemon balm need speed. Below, the temperatures and times from eight extension sources are set out together, and where they differ, you get the range or both views. For growing one of them, see how to grow cilantro.
| Cut most herbs | Just before the flowers open, or as the first flower buds show |
|---|---|
| Sturdy herbs to hang | Rosemary, sage, parsley, thyme, summer savory |
| Moist herbs that mold | Basil, tarragon, lemon balm, the mints; one list adds oregano |
| Hanging bundles | 5 to 6 stems at 70 to 80 F out of direct sun; generally 2 to 4 weeks, up to a month |
| Dehydrator | 95 to 115 F, up to 125 F where humid; 1 to 4 hours |
| Oven | Ideally 90 to 110 F, door open; upper limits run 180 to 200 F; may take 3 to 4 hours |
| Microwave | Small amounts only, between paper towels; one guide calls it a last resort |
| Dry when | Leaves crumble and stems break when bent |
| Storage | Airtight, cool, dry and dark. Most keep well up to a year; for full flavor, use most within 6 months to about a year |
| Dried for fresh | Use 1/4 to 1/3 as much as fresh |
When to harvest herbs for drying
Cut most herbs just before the flowers open, at the bursting bud stage, and pick once the dew is off the leaves. One guide cuts most herbs earlier, as the first flower buds show, because the leaves then hold the most oil; herbs already in bloom can still be dried.
The new leaves at the tip of a stem carry the strongest flavor, herbs in flower tend toward bitterness, and a plant in flower makes fewer leaves. The guides split on the hour: some gather in the early morning, once the dew has dried, to keep wilting down; others wait for mid-morning, once the leaves are dry and ahead of the heat of the day, when herbs hold more of their essential oils.
How much to take. Annual herbs can be cut back by 50 to 75 percent and still recover. From a perennial, take about a third of its growth in one cutting, up to a third of this year's growth, and end big perennial harvests in late summer or fall so new growth can harden before winter. Cut just above a leaf or a pair of leaves and leave 4 to 6 inches of stem to regrow. Harvest only from plants that have not been sprayed, since many pest and disease products are not cleared for herbs whose leaves are eaten.
To get herbs ready to dry:
- Start with clean counters and tools, and wash your hands.
- Throw out bruised, dirty or damaged leaves and stems.
- Rinse in cool water and shake off the extra.
- Pat dry with paper towels or spin in a salad spinner. Remove every visible drop, because wet herbs can mold and spoil the whole bunch.
- Label each kind as you go, since many herbs look alike once dried.
How to air dry herbs in bundles
Tie 5 or 6 stems of a sturdy herb into a bundle and hang it upside down in a warm, dry, airy room out of direct sun until the leaves crumble, which generally takes 2 to 4 weeks and may take up to a month. Of the methods here, air drying costs the least.
Which herbs hang well. Rosemary, sage, parsley, thyme and summer savory are sturdy, and so are dill, bay leaves, marjoram, cilantro (our cilantro guide covers saving its seed as coriander) and winter savory. Oregano is where the lists part ways: one counts it as sturdy, while another groups it with the moist herbs that mold.
To hang a bundle:
- Bind the cut ends of 5 or 6 clean, dry stems with a rubber band. It tightens as the stems shrink, so none slip out.
- If you like, slip the bundle heads down into a paper bag with holes cut or punched in the sides. The bag keeps dust off and catches leaves and seeds that fall; leave enough room that the leaves do not touch the bag.
- Hang it upside down at 70 to 80 F.
- Wait until the leaves crumble between your fingers, which may take up to a month.
Where to hang them. An attic or a linen closet is often a good choice, and basements are usually too damp. Garages split the guides: one steers away from them because of car fumes, while another lists a garage, a shed, a barn or an airy attic as good spots. Keep bunches away from the sink, stove and dishwasher, all sources of moisture. Dry them indoors, where herbs usually keep better color and flavor than outside. Sun drying is not recommended: it can cost the herbs flavor and color, and in humid places such as Pennsylvania, moisture does not leave fast enough.
An extra step against insects. Herbs and seeds dried in the open air can carry insects or their eggs, and one guide treats them before storage: heat them at 160 F for 30 minutes, or freeze them at 0 F or below for at least 48 hours. The heat costs some flavor and should not be used on seeds you plan to sow.
Drying herbs on a screen or tray
Spread small-leaved sprigs, loose leaves or chopped herbs one layer deep on a screen, prop it up so air moves underneath, and keep it somewhere warm and dry until the leaves are crisp. Trays work well for short-stemmed herbs and single leaves.
Build a tray from fine mesh screen or cheesecloth fixed to a wooden frame, or simply set a small window screen up on blocks. A screen of food-safe plastic or fine stainless steel works too, and so do paper towels.
- Small leaves. Dry whole sprigs, then strip the leaves off once they are dry.
- Large leaves. Pull them off the stems and space them so none touch.
- Layers. Up to five layers of herbs can dry between paper towels; change damp towels as needed.
- Turning. Turn leaves as needed for even drying.
- Time. On paper towels on a tray, leaves usually take 5 to 10 days. This works well for bay, mint and sage, and the leaves dry flat and keep their color.
Seed heads. For dill, caraway and coriander seed, cut the whole head just before it turns brown, since riper seed often drops during cutting, and finish it in a paper bag in a warm, dry place; seeds generally take longer than leaves. Shake the seed loose inside the bag, then rub off the husks between your hands and blow away the chaff.
How to dry herbs in a dehydrator
Preheat the dehydrator to 95 to 115 F, spread rinsed and shaken herbs one layer deep on the trays, and check them now and then; drying times vary from 1 to 4 hours. Because you can control the heat and the airflow, a dehydrator dries high quality herbs fast.
The settings vary a little. Most of the guides give 95 to 115 F and allow up to 125 F where the air is humid; one keeps between 95 and 110 F, and another uses 100 F and finds most herbs done within three hours. Home dehydrators do an excellent job with herbs.
- Keep stems apart. Lay stems so they do not touch; large leaves can dry on their own.
- Herbs only. Keep fruit and vegetables out of an herb batch: flavors may mix, and their moisture levels differ.
- Read the manual. Check the dehydrator's own booklet for settings.
The herbs are done when the leaves crumble and the stems break when you bend them.
Can you dry herbs in the oven or microwave?
Yes, you can, but both cost some flavor. One guide generally advises against the oven, because even the lowest setting destroys much of an herb's flavor, oils and color, and another calls the microwave a last resort that cooks the herbs. If you use either, keep the heat low and the batch small.
| Method | Setting | Time | Notes |
|---|---|---|---|
| Dehydrator | 95 to 115 F in most guides, up to 125 F where humid; 95 to 110 F or 100 F in others | 1 to 4 hours; most herbs within 3 hours at 100 F | One guide prefers it for moist herbs; follow the owner's manual |
| Oven, low setting | Ideally 90 to 110 F, or about 100 F; upper limits of 180 F in two guides and under 200 F in one | 3 to 4 hours, door open or ajar | One guide generally advises against it; many ovens will not go low enough |
| Oven, light or pilot only | No heat setting: an electric oven's light or a gas oven's pilot | Overnight | Leaves between paper towels, up to five layers |
| Microwave | On high, small amounts (one guide: 1 to 2 cups at most) | 1 to 3 minutes per cup, checked every 30 seconds | 1,000 watts or more may heat too fast; one guide calls it a last resort |
Where the guides give different figures, a cell shows the range or each figure; "one guide" marks a view only one of them takes.
In the oven. Spread leaves or stems one layer deep on a baking sheet or shallow pan and stir them now and then until dry. Many ovens will not go as low as 90 to 110 F, and the herbs then lose flavor and color. Another version uses no heat setting at all: lay the nicest leaves on a paper towel so none touch, cover with another towel, stack up to five layers, and let the light of an electric oven or the pilot of a gas one dry them overnight. It is especially nice for mint, sage and bay leaf, and where the air is humid it works better than hanging whole stems.
In the microwave. Keep it to small amounts and watch closely: several of the guides warn of fire.
- Towels. Lay the herbs one layer deep between microwave-safe paper towels. Use plain white towels, never ones made from recycled paper, which often hold metal bits that can spark and catch fire.
- Short bursts. Start with 1 minute, then stir every 30 seconds; stop when the herbs are almost dry and let them finish at room temperature.
- Dry going in. Any water left on the leaves makes them cook instead of dry.
- Which herbs. Some microwaves dry parsley, basil and celery leaves well, and chives, sage and thyme are often dried this way too.
- Stay close. With too little in the oven, the towels can catch fire. Check your microwave maker's directions first.
How to dry basil and other leafy herbs without mold
Dry basil fast and in small amounts, because its leaves hold so much water that they mold when they dry slowly. Use a dehydrator if you have one, or dry the leaves flat or in small bunches inside vented paper bags. Basil, the mints, tarragon and lemon balm make up this moist group, and one list adds oregano.
- Small bunches in a bag. Hang moist herbs in small bunches inside paper bags with holes torn or punched in the sides (or vents cut in the bag's top and side), close it at the top with a rubber band, and hang them where air moves through the bag. Large amounts will mold.
- Most successful in dry air. Moist herbs can sometimes be air dried like sturdy ones, most successfully when the humidity is low. Tie them in smaller bunches, check them for mold, and throw out any bunch that goes bad.
- Other options. A dehydrator suits basil, the mints, lemon balm and tarragon, and the cool-oven method above is especially nice for mint.
Basil. Guides differ on air-drying basil. One calls it easily dried for later use. Another hangs small bunches in a warm, dry, airy room for a week or lays the leaves flat on a rack, but finds that air-dried basil goes an unappealing brown and calls freezing the better method. Pinch out basil's flower buds the moment they appear, because buds left on the plant change the flavor of the leaves. Basil and mint can also dry in a vented paper bag, or with the leaves in one layer on a cooling rack.
Chives. Chives can be dried but lose their color and take up moisture quickly; freezing is another option. Chopped chives dry well on a screen.
How to store dried herbs
Once the leaves are crisp and crumble between your fingers, strip them from the stems and pack them whole in airtight containers kept somewhere cool, dry and dark. Most dried herbs keep well up to a year; for full flavor, use most within 6 months to about a year.
Check that the stems are brittle and snap when bent and that leaves and seeds fall from the stems; herbs need to be fully dry before they go in, or mold can grow in storage.
- Let them cool completely. Dried food packed warm sweats inside the container, which could give mold the moisture it needs.
- Strip the leaves and keep them whole: whole leaves keep their flavor longer than crushed or ground ones. Crush them just before cooking.
- Pack them in airtight containers such as canning jars, zip closure bags or tightly sealed tubs. Vapor-proof containers also keep the herbs from taking up moisture, and nearby food from taking up their scent.
- Watch new containers for a couple of days. If moisture shows, take the herbs out and dry them longer. Glass lets you see any moisture inside.
- Keep them in a cupboard or drawer away from the stove and sink, never on the stovetop or a windowsill.
Freezer and shelf life. Airtight containers of dried herbs can also go in the freezer, but a cold jar brought into a warm kitchen may gather enough condensation for the herbs to spoil. For full flavor, use most dried herbs within 6 months to about a year; they keep for years, just with less flavor. Storage times for dried foods in general run from 4 months to a year, shorter the warmer the storage, and anything moldy should be thrown out.
Cooking with them. Dried herbs usually run 3 to 4 times stronger than fresh, so a recipe's fresh amount becomes 1/4 to 1/3 as much dried.
Herbs in oil. Oil flavored with herbs is a separate food-safety matter. Herbs are low-acid foods that can carry Clostridium botulinum, and the oil around them makes an oxygen-free space where those bacteria grow, so herbs in oil need careful storage to prevent botulism food poisoning. For oil seasoned with dried herbs, the limits differ widely: one guide says the oil has to go in the refrigerator and be used within 4 days, or else be frozen to keep longer, while another describes refrigerating it for up to three months. Both keep it in the refrigerator, and 4 days is the stricter of the two limits. For oil flavored with fresh herbs or garlic, storing it as a preserved product has not been recommended for home preservers. Instead, refrigerate fresh-herb oil and use it within 2 to 4 days, or freeze it. The other route is a tested University of Idaho method that first acidifies garlic, basil, oregano or rosemary, which this guide does not cover.
Herb drying racks and supplies
Most herb drying needs only scissors or pruners, rubber bands, paper bags and a screen. Cut with scissors or garden shears, or use a sharp knife or pruners for clean cuts. Beyond that, three things do most of the work.
- A drying screen or rack. A window screen or a frame of fine mesh, in stainless steel or food-safe plastic.
- A dehydrator with a thermostat, so you can hold a setting between 95 and 115 F.
- Airtight jars. Glass shows any moisture inside, and a cool, dark cupboard keeps light off.
What you'll need for drying herbs
As an Amazon Associate we earn from qualifying purchases.

Montex 4 Tier Stackable Herb Drying Rack with Stainless Steel Mesh
A frame of fine mesh in stainless steel or food-safe plastic, set up so air moves underneath.
Check price on Amazon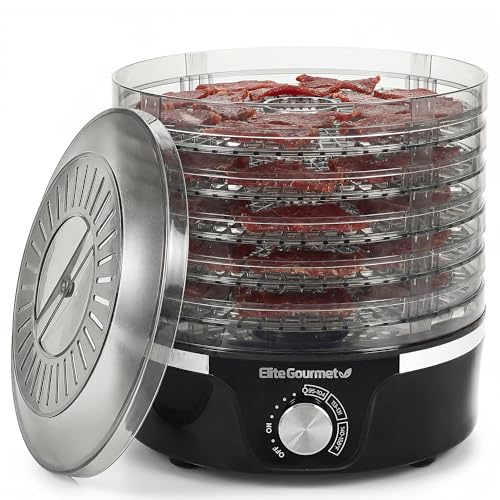
Elite Gourmet Electric Food Dehydrator, 5 Trays
A dehydrator with a thermostat, so you can hold a setting between 95 and 115 F. The maker lists this one at 95 to 158 F.
Check price on Amazon
Ball Regular Mouth Pint Mason Jars with Lids and Bands
Airtight jars. Glass shows any moisture inside, and a cool, dark cupboard keeps light off.
Check price on Amazon
Corona FS 3214D ComfortGEL Micro Snips
Use a sharp knife or pruners for clean cuts.
Check price on Amazon
Sources we used
We took every number on this page from the pages below and saved a copy of each. When two of them disagree, the page shows both.
- "National Center for Home Food Preservation: Drying, Herbs", taken from the book So Easy to Preserve, 6th edition (University of Georgia Cooperative Extension)
- "Penn State Extension: Let's Preserve: Drying Herbs" (updated July 31, 2023) and "How to Safely Make Infused Oils" (updated April 4, 2024)
- "Oregon State University Extension Service: Drying herbs" (SP 50-921, revised January 2025) and "Herbs and vegetables in oil" (SP 50-701, revised January 2025)
- "University of Wisconsin-Madison, Wisconsin Master Gardener: Drying Herbs" (posted September 2012)
- "Illinois Extension, Herbs: Preserving", with its "Harvesting", "Basil" and "Chives" pages
- "Clemson Cooperative Extension, HGIC 3086: Drying Herbs, Seeds & Nuts" (revised August 20, 2007)
- "University of Vermont Extension: Drying Garden Herbs" (July 7, 2023), by an Extension Master Gardener
- "University of Minnesota Extension: Growing basil in home gardens" (reviewed in 2026)
Related guides
- How to grow cilantro, from sowing to saving coriander seed.
- Companion planting chart, including the herbs extension services pair with vegetables.
- How to grow fennel, including when to cut its seed heads.
Frequently asked questions
How long does it take to air dry herbs?
Hanging bundles of sturdy herbs generally take 2 to 4 weeks to dry in a warm, dry, airy spot out of direct sun, and may take up to a month. Leaves on paper towels go faster, usually 5 to 10 days. They are ready when they crumble.
Can you dry herbs in the oven?
Yes, though one guide generally advises against it, because even the lowest setting strips out much of an herb's flavor, color and oils. Hold the oven at 90 to 110 F if you can, with the door slightly open; the upper limits given run from 180 to 200 F. Drying may take 3 to 4 hours.
How do you dry basil leaves?
Dry basil quickly and in small amounts, because its leaves hold so much water that they mold if they dry slowly. A dehydrator suits it if you have one. One guide finds that air-dried basil turns brown and calls freezing the better method.
How do you dry chives?
Chop chives and dry them in one layer on a screen, a good method for chopped chives. Dried chives lose color and take up moisture quickly, so freezing is another option. Chives are also often dried in a microwave.
How do you know when herbs are dry?
Herbs are dry when the leaves are crisp and crumble easily between your fingers and the stems snap when bent. After packing, watch new jars over the next couple of days; any moisture inside means the herbs need more drying.
How long do dried herbs last?
Most dried herbs keep well up to a year in an airtight container kept cool, dry and dark. For full flavor, use most within 6 months to about a year; sage alone grows stronger in storage.
How much dried herb equals fresh?
Use 1/4 to 1/3 as much dried herb as fresh, because dried herbs usually run 3 to 4 times stronger. Put another way, 1 tablespoon of fresh herb equals 1 teaspoon dried or 1/4 teaspoon powdered. For the fullest flavor, crush the leaves just before using them.